Thoughts on Basic Structure of ASP.NET Core Web API
Prologue
The inspiration of this post comes from this article.
I’ve been always looking forward to develop backend with ASP.NET Core, but when I’m actually doing this, I found the start up being a little tough. So I decide just write things down as a memo.
1. Setup Project
1.1 Create Project
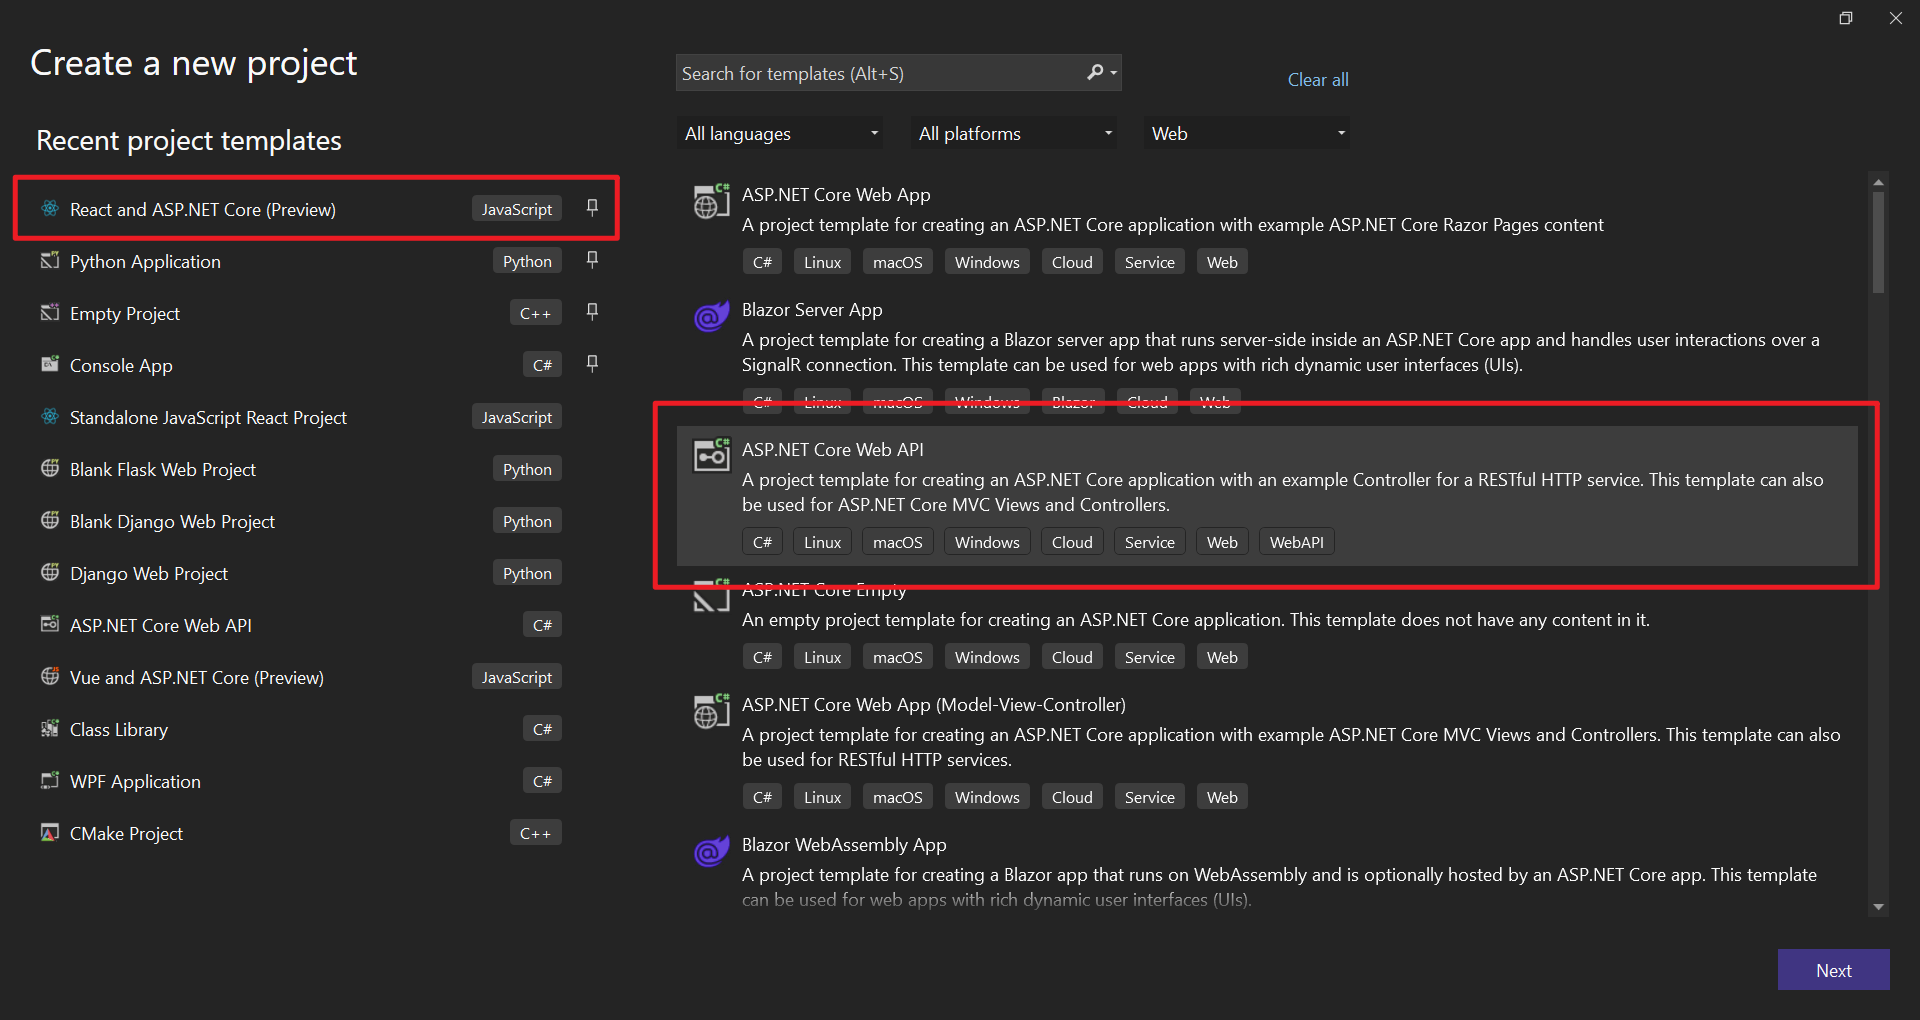
Well, of course, we use Visual Studio as our IDE. Create a project using “ASP.NET Core Web API” template. If you want a frontend, just use “React and ASP.NET Core (Preview)”. Although in preview, I think it is quite awesome.
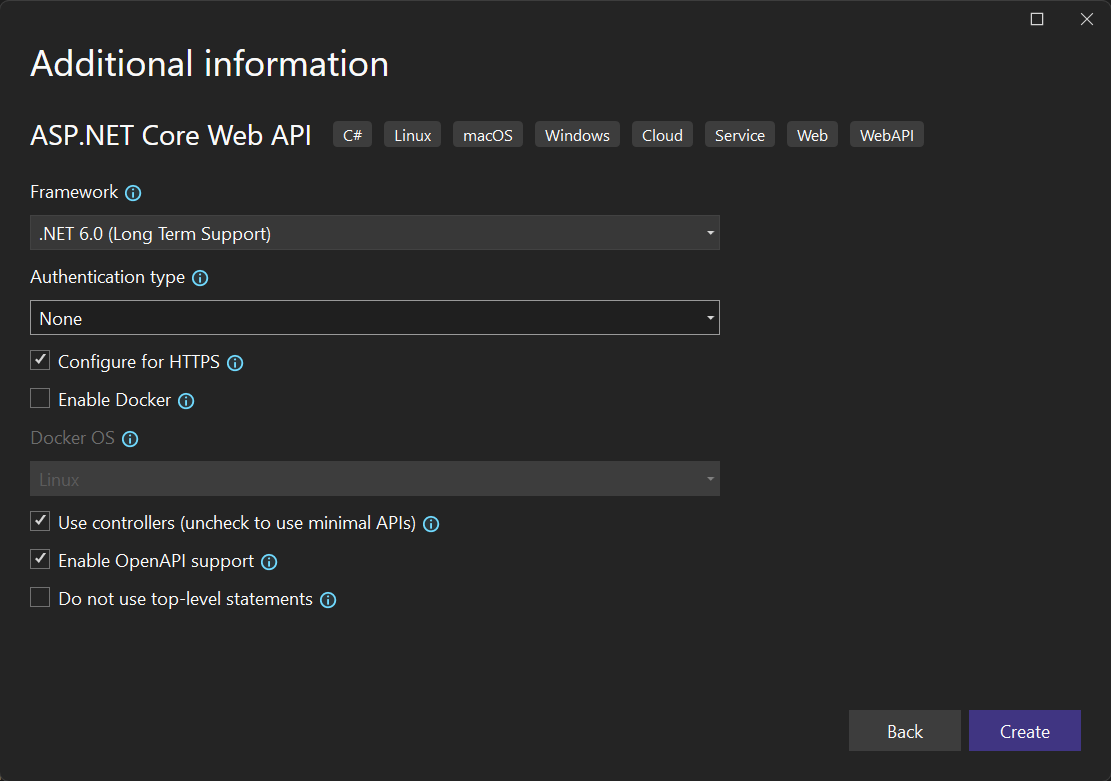
Then, for additional information, just leave it default is OK. Or you can just select another framework.
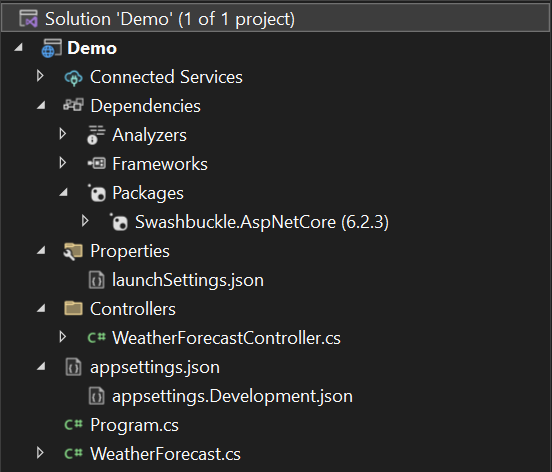
After creation, you will get a structure like this. But this structure is apparently not what we like.
1.2 Essential NuGet Packages
Well, you can download these NuGet packages later, but a quick preview of them may help you know what package you can utilize.
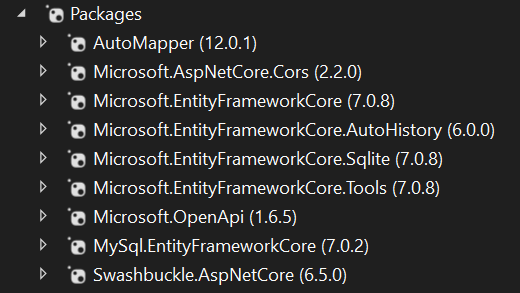
Well, Microsoft.EntityFrameworkCore packages enables the powerful Entity Framework Core, which is an excellent ORM framework. And then MySql.EntityFrameworkCore add support for MySQL database connection. Then, if you got CORS problem, you’ll need Microsoft.AspNetCore.Cors package. At last, AutoMapper is an extraordinary convenient tool for you to map entity to Data Transfer Object (DTO).
2. Refactor Project Structure
2.1 Application Entry
In .NET 6, the Startup.cs is removed, and replaced by Program.cs alone. But, personally, I don’t prefer this, as it looks messy.
So first, we refactor Program.cs. Now it looks better.
1 | public static class Program |
Then, we create Startup.cs next to Program.cs. An brief overview of this file is like this. And you can expand the complete version.
1 | public class Startup |
Startup.cs
1 | public class Startup |
2.2 Application Configuration
The configuration for the project is in appsettings.json, and it can be overwritten depends on the environment. So there are actually three configuration files.

You may need to create
appsettings.Production.jsonmanually.
The content of the configuration can be like this.
1 | { |
And if you use MySQL, the connection string for MySQL could be like this.
1 | "server={ip};database={database};user={user};password={password}" |
If you’re not using the default 3306 port, then the connection may look like this.
1 | "server={ip};port={port};database={database};user={user};password={password}" |
Which appsettings.json is used is based on the environment value ASPNETCORE_ENVIRONMENT. That is to say, the application will load appsettings.{ASPNETCORE_ENVIRONMENT}.json. If not set, will load appsettings.json.
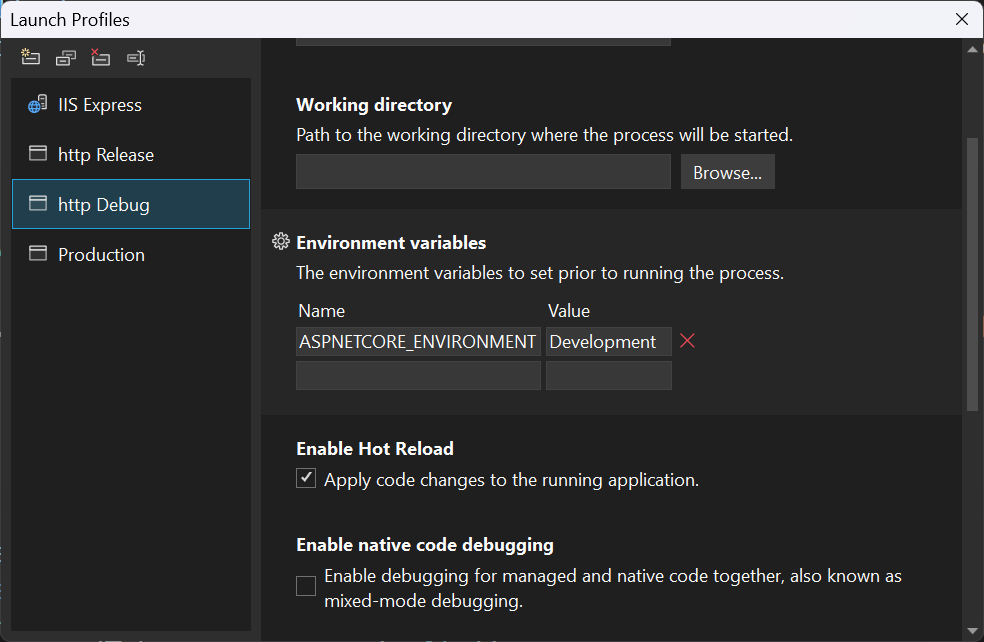
There’s another configuration file called launchSettings.json, which mainly configures the port of the API.

2.3 Project Structure
2.3.1 Overview
Well, according to Maybe it’s time to rethink our project structure with .NET 6, we can use module to manage our project. And based on the idea in this article, we can refactor our project like this.
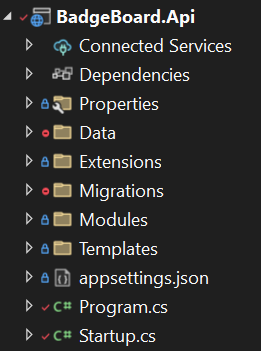
Let me have a brief elaboration. Data\ is for the SQLite database file, and Migrations\ is for the migration files created by EF Core. Extensions\ holds all common utils or base classes (I’ll explain this later). And Modules\ is where all our business module are placed. For Templates\, I adopted this concept from Django, where template HTML files are saved.
2.3.2 Extensions
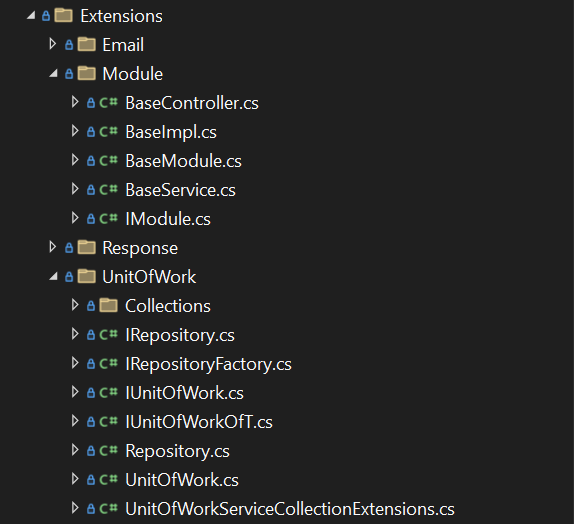
Well first, an overall glance. The most important and fundamental packages are Module and UnitOfWork.
2.3.2.1 Module
Module holds all base classes and interfaces required for our modules. For example, the IModule interface.
1 | public interface IModule |
Then, for web API, we often use MVC pattern, and usually relay actual logic from Controller to Service class. Here is the main place where Dependency Injection (DI) is used.
For more information about Dependency Injection in ASP.NET, see:
1 | public class BaseController<TController> : Controller where TController : Controller |
2.3.2.2 Unit Of Work
Another important part is Unit of Work Pattern, which often comes along with Repository Pattern. For detailed information, you can refer to Microsoft official documentation.
Here, I use the implementation provided by Arch.
GitHub: Arch/UnitOfWork
2.3.2.3 Response
You may also want to wrap up your responses. Here I offer a simple but practical way.
1 | public class ApiResponse : JsonResult |
With this, you can extend other responses, for example,
1 | public class GoodResponse : ApiResponse |
Then, for the value, it can be this, which will later be wrapped as DTO.
1 | public class ApiResponseData |
The DTO is extended can be like this.
1 | public class GoodDto : ApiResponseData |
2.3.3 Modules
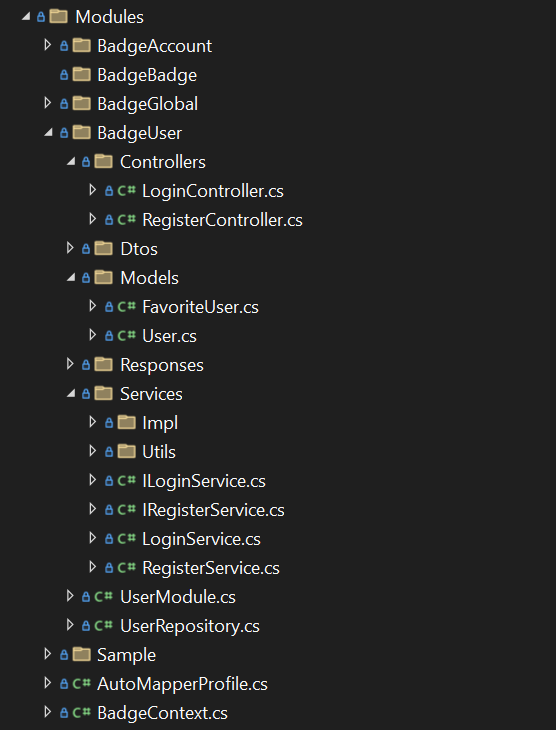
Again, first an overview. We put all our modules under Modules/ packages, and each module has its own models, controllers, services and else.
2.3.3.1 Database Context
First, is two file outside all modules. There must be a context for database support, as we have already seen above in Startup.ConfigureServices.
The constructor here is not always empty, though. If you use Fluent API to define properties of your entities, you will have to do that. But I prefer data annotation. Read more in my other post.
1 | public class BadgeContext : DbContext |
2.3.3.2 Auto Mapper Profile
Another global configuration file is AutoMapperProfile.cs. This one defines all mapper from entity to DTO. This is really convenient, since it easily support nested mapping. ReverseMap makes reverse mapping available.
1 | public class AutoMapperProfile : MapperConfigurationExpression |
2.3.3.3 Business Module
Now, for our actual modules. Notice that, each module must have a main module file to load corresponding module, as mentioned above. For example, it looks like this. Its main purpose is to link entities with their repositories, and use IoC to prepare services to be injected by DI.
1 | public class UserModule : BaseModule |
Then, in controller, just relay logic to services.
1 | [] |
Above controller will have a route called
api/Register/Register(with upper case). However, you can use custom string instead of[ ].
Epilogue
Well, I’m still a noob, and it is as far as I can describe. So… let it be.


