Document Scan Effect in Photoshop
“It isn't that they can't see the solution.
It is that they can't see the problem.”
— Gilbert Chesterton
Prologue
When a copy of your document is required, but there is no printer available, what to do? Well, there are plenty of software you can use to apply a document filter so that it looks exactly like what comes out of a printer.
While there are mobile apps that is capable of doing this, I still prefer a solution on PC partly due to my personal affection. Currently, I’m doing this with Adobe Photoshop. And in the last part, I’ll talk about how to automate this process for batch editing.
By the time of this post, I’m using Adobe Photoshop 2023.
“Scan” the Photo
1. The original image
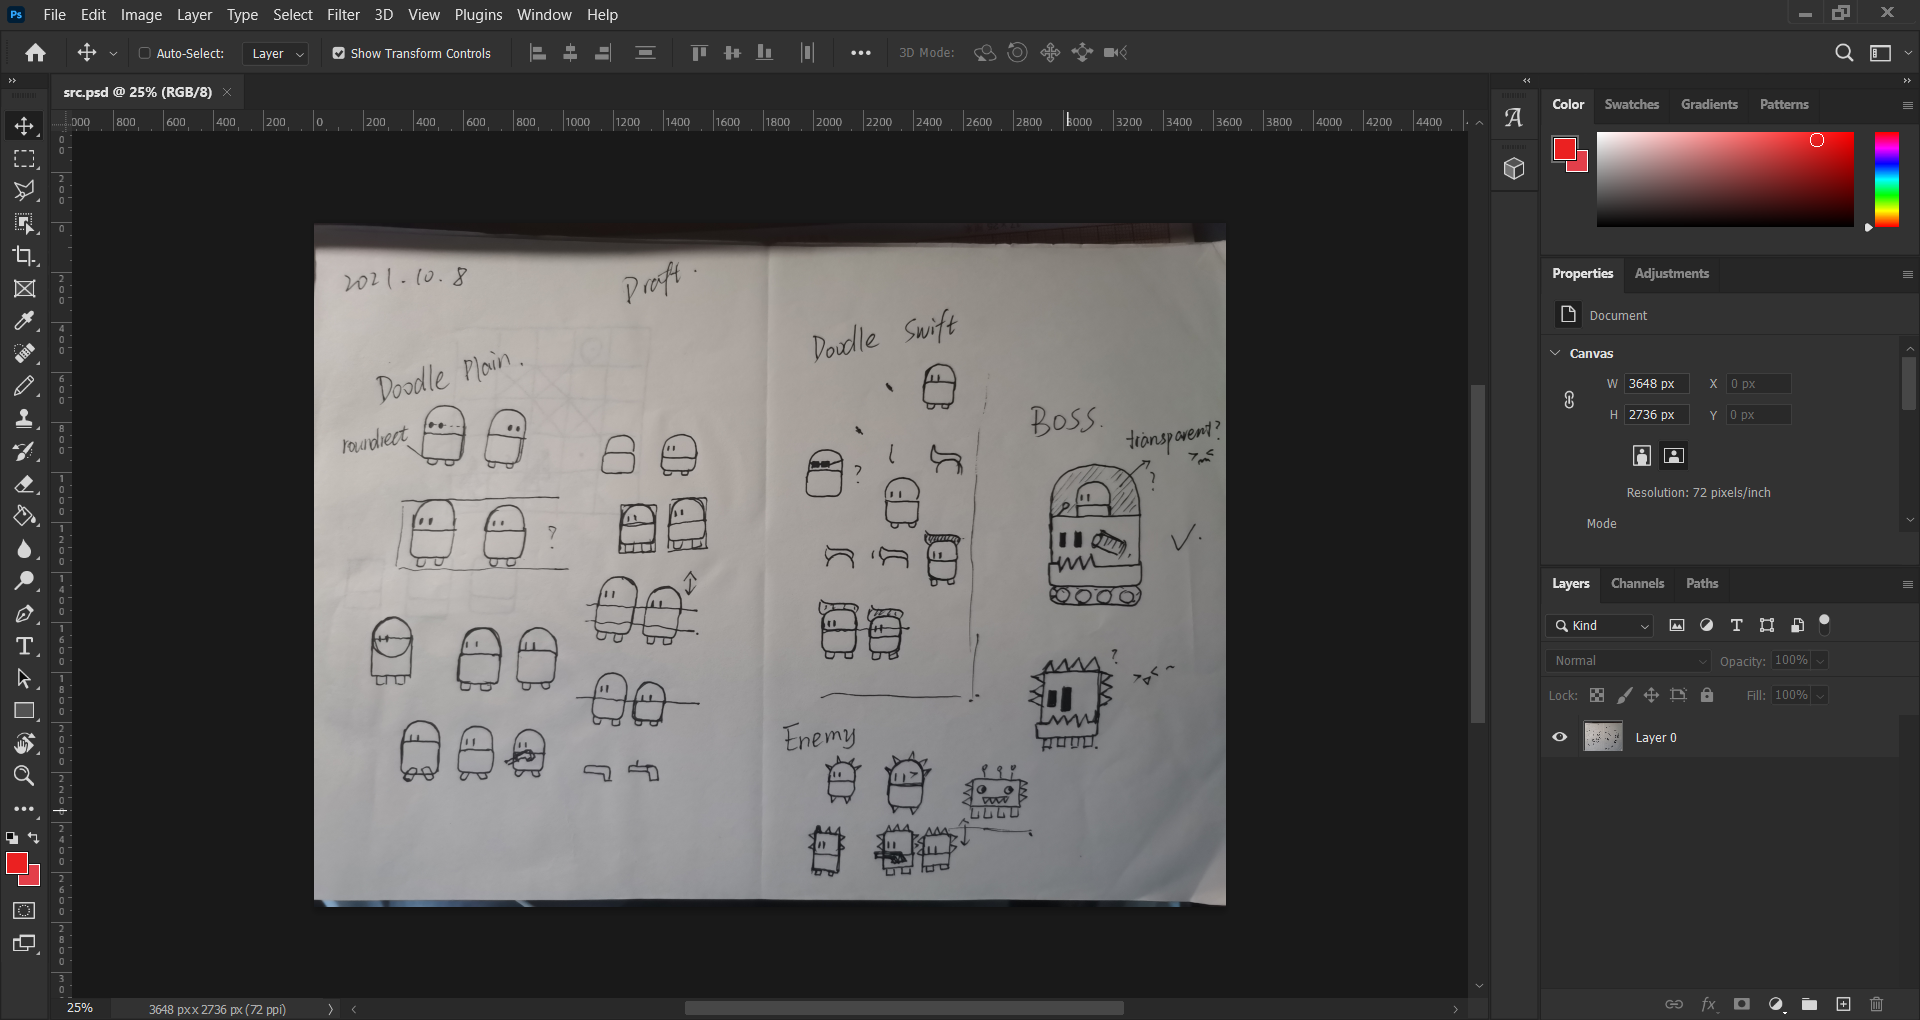
Now, let’s see how to create scan effect in Photoshop. First, prepare our “victim”. 🤯 Here I choose a draft when I was designing my game Dungeon. Open it in Photoshop, and you should get this.
2. Basic scan effect
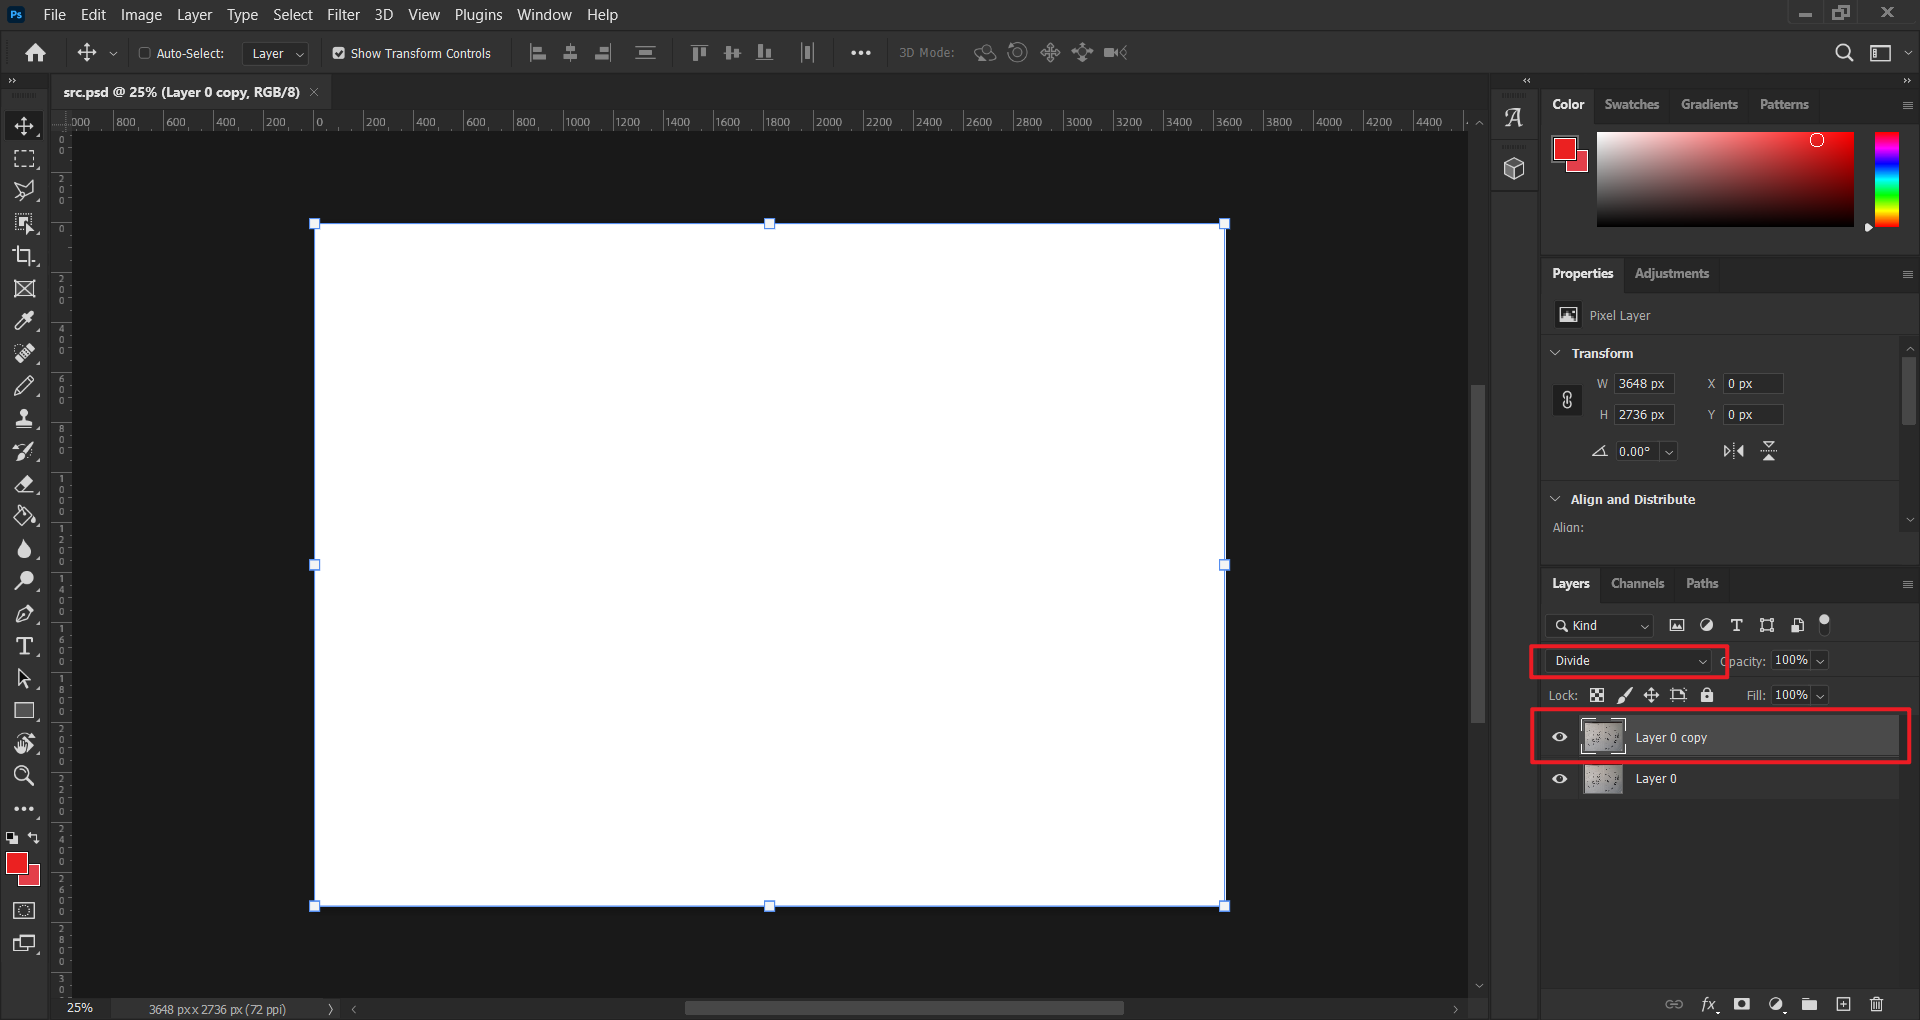
In “Layers” dialog, duplicate “Layer 1”, so we could have a mask layer (I’ll call this layer mask later). You can select the layer and press “Ctrl + J” to duplicate it. Or right click on it, and choose “Duplicate layer” in the pop up menu. Then, choose “Divide” for the mask.
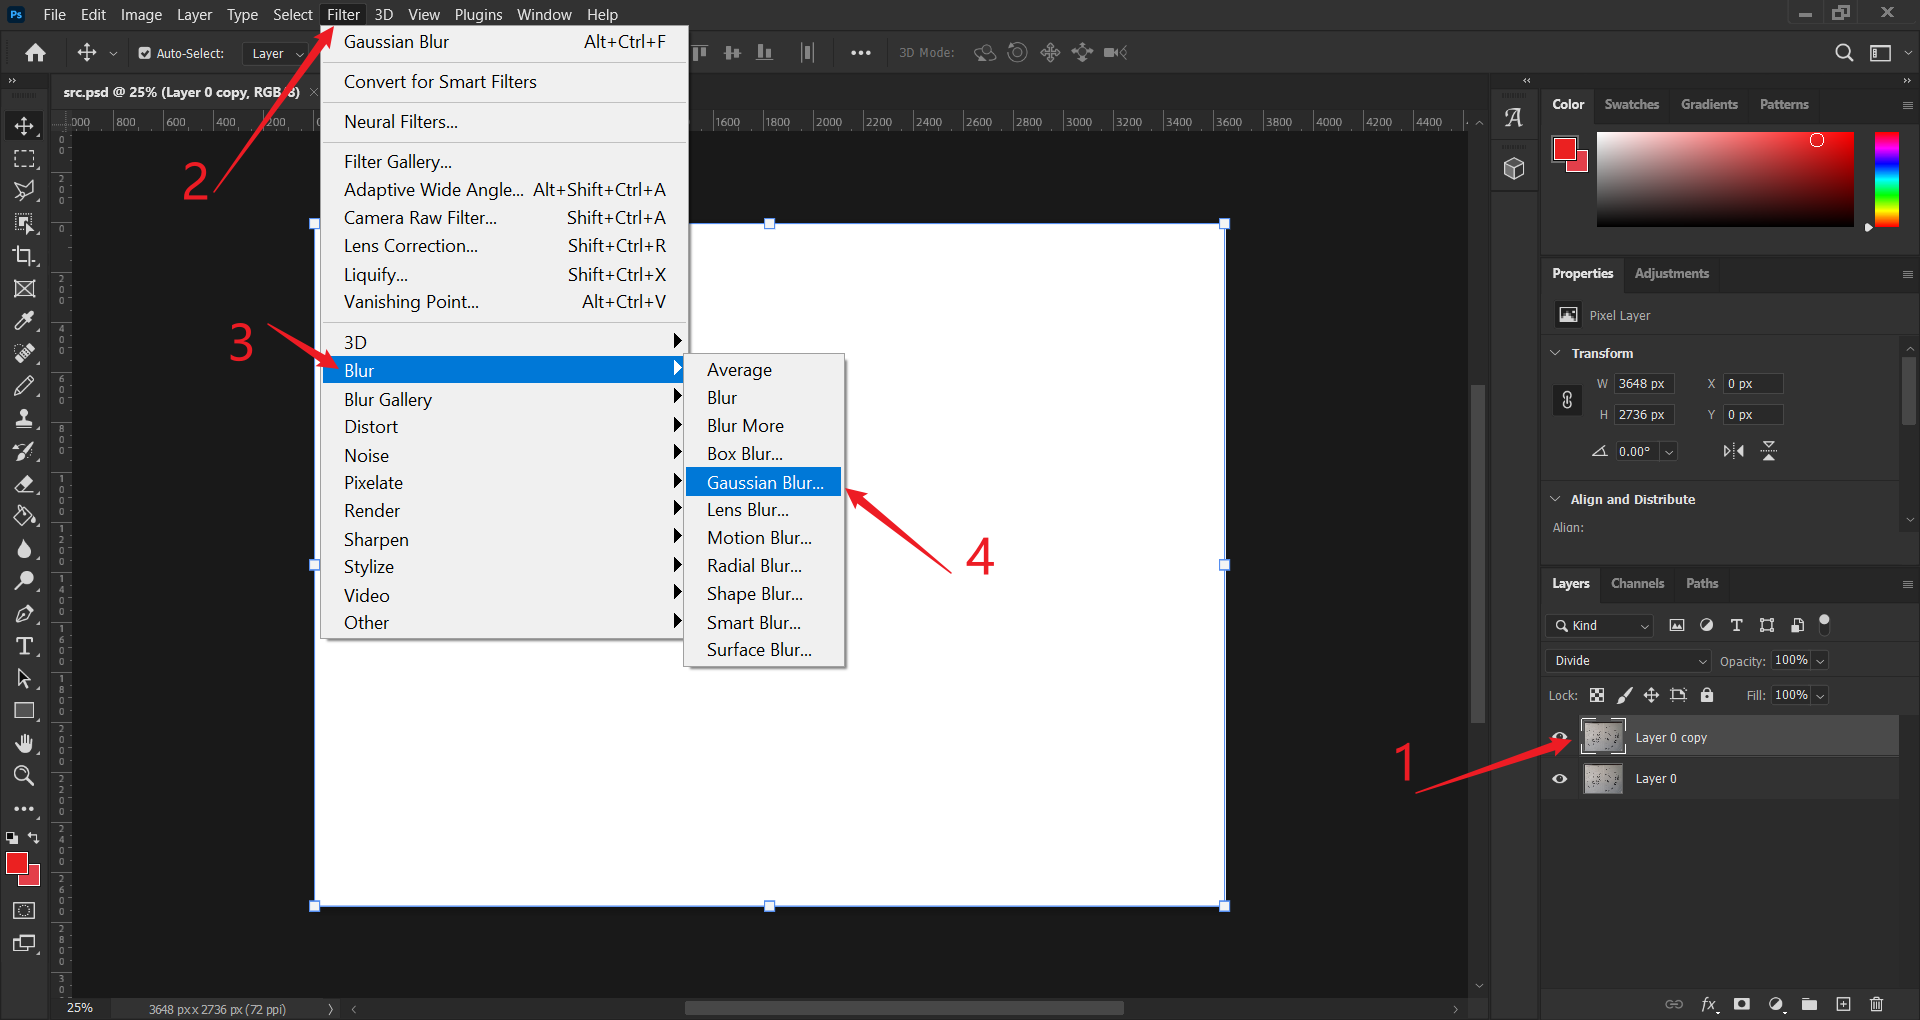
Now, it’s time to make it look like a scan copy. Select the mask, and apply Gaussian Blur filter to it.
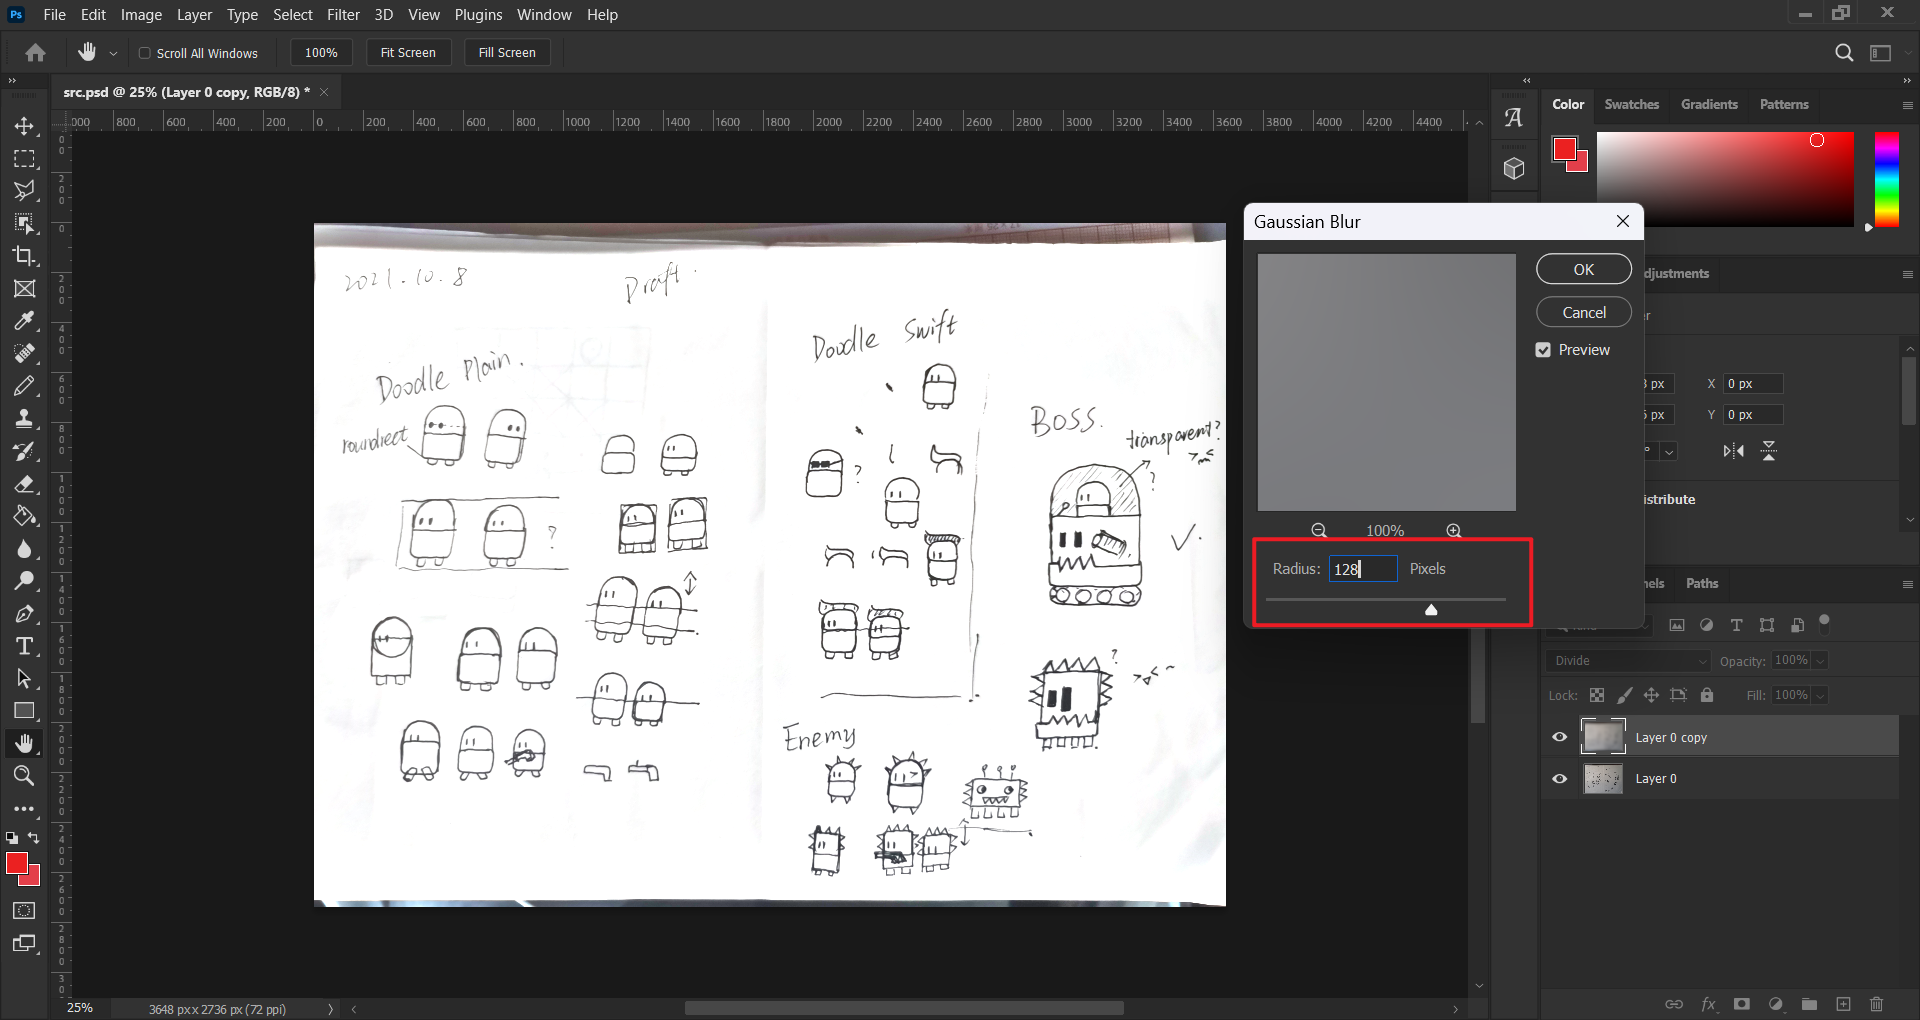
In the “Gaussian Blur” dialog, adjust blur radius until you’re satisfied with the result. It may not be perfect, but we can fine-tuning it later.
3. Fine-tuning the effect
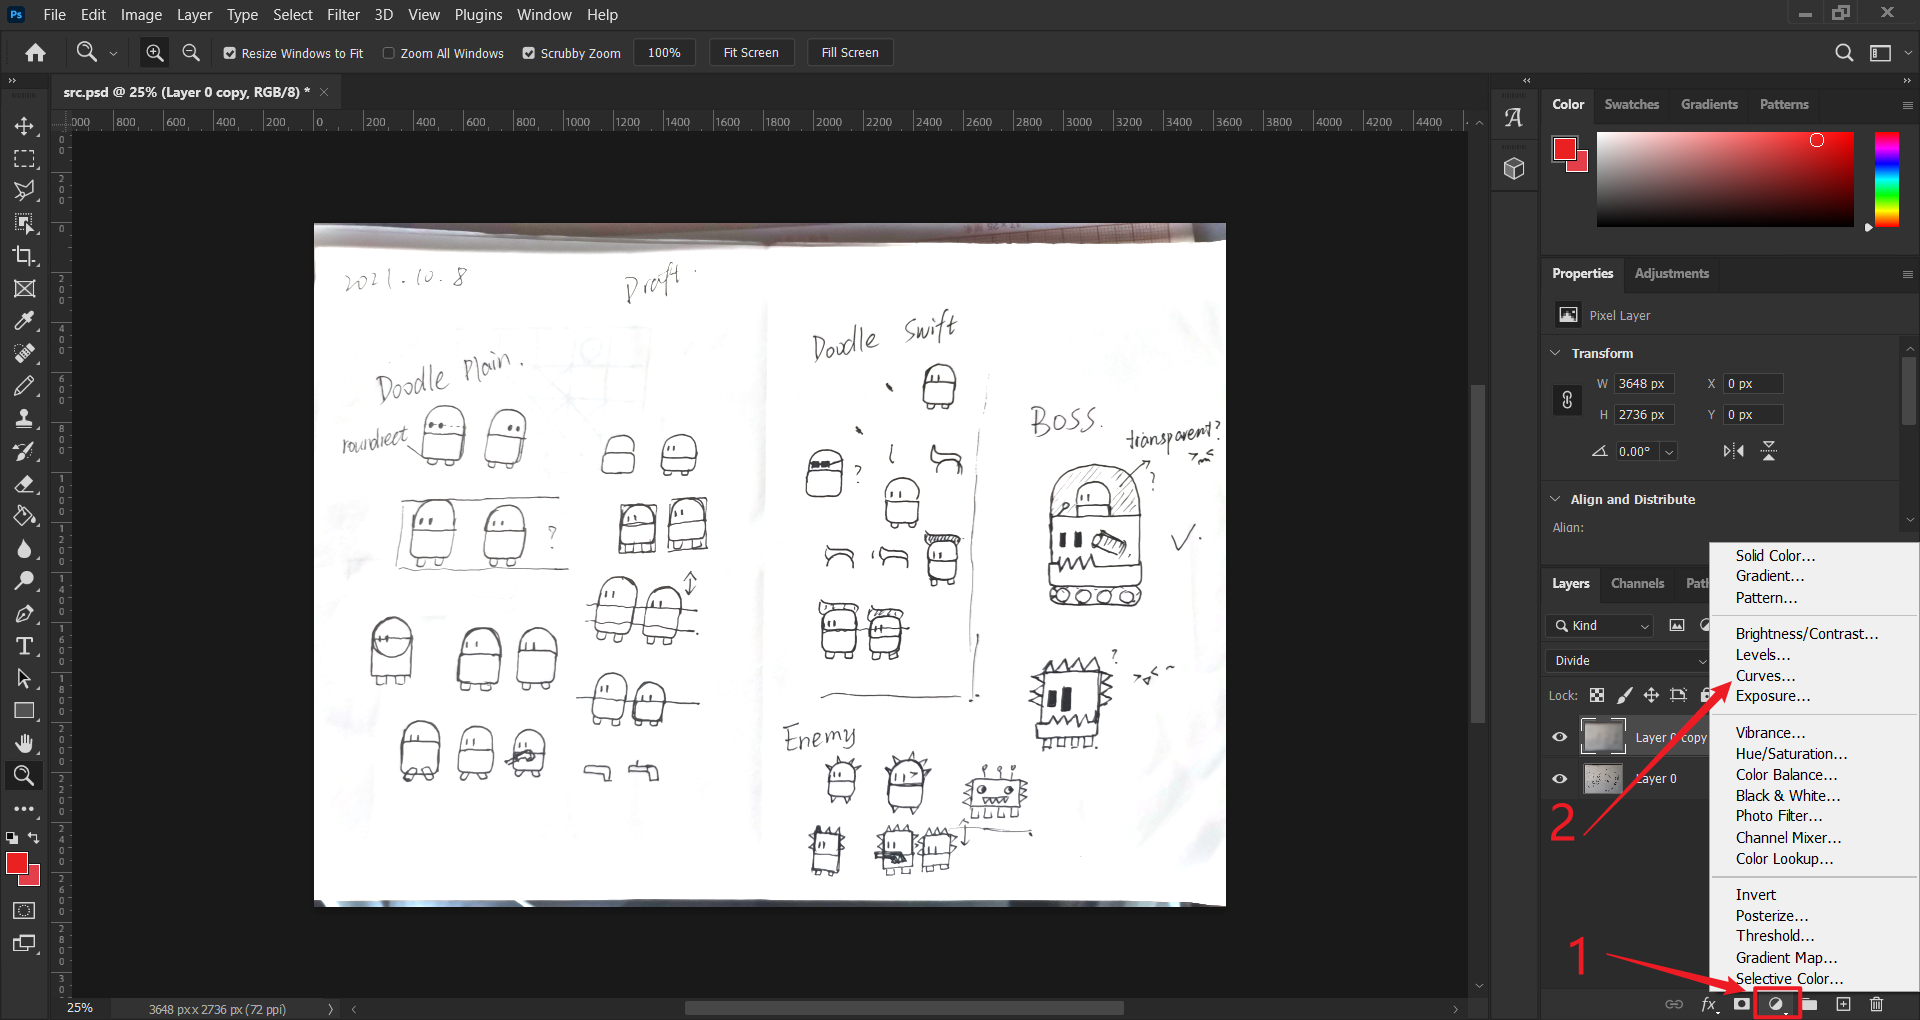
We’ve got a not-bad effect in the last step, and now we’re going to make it better. First, select the mask and add “Curves” to it.
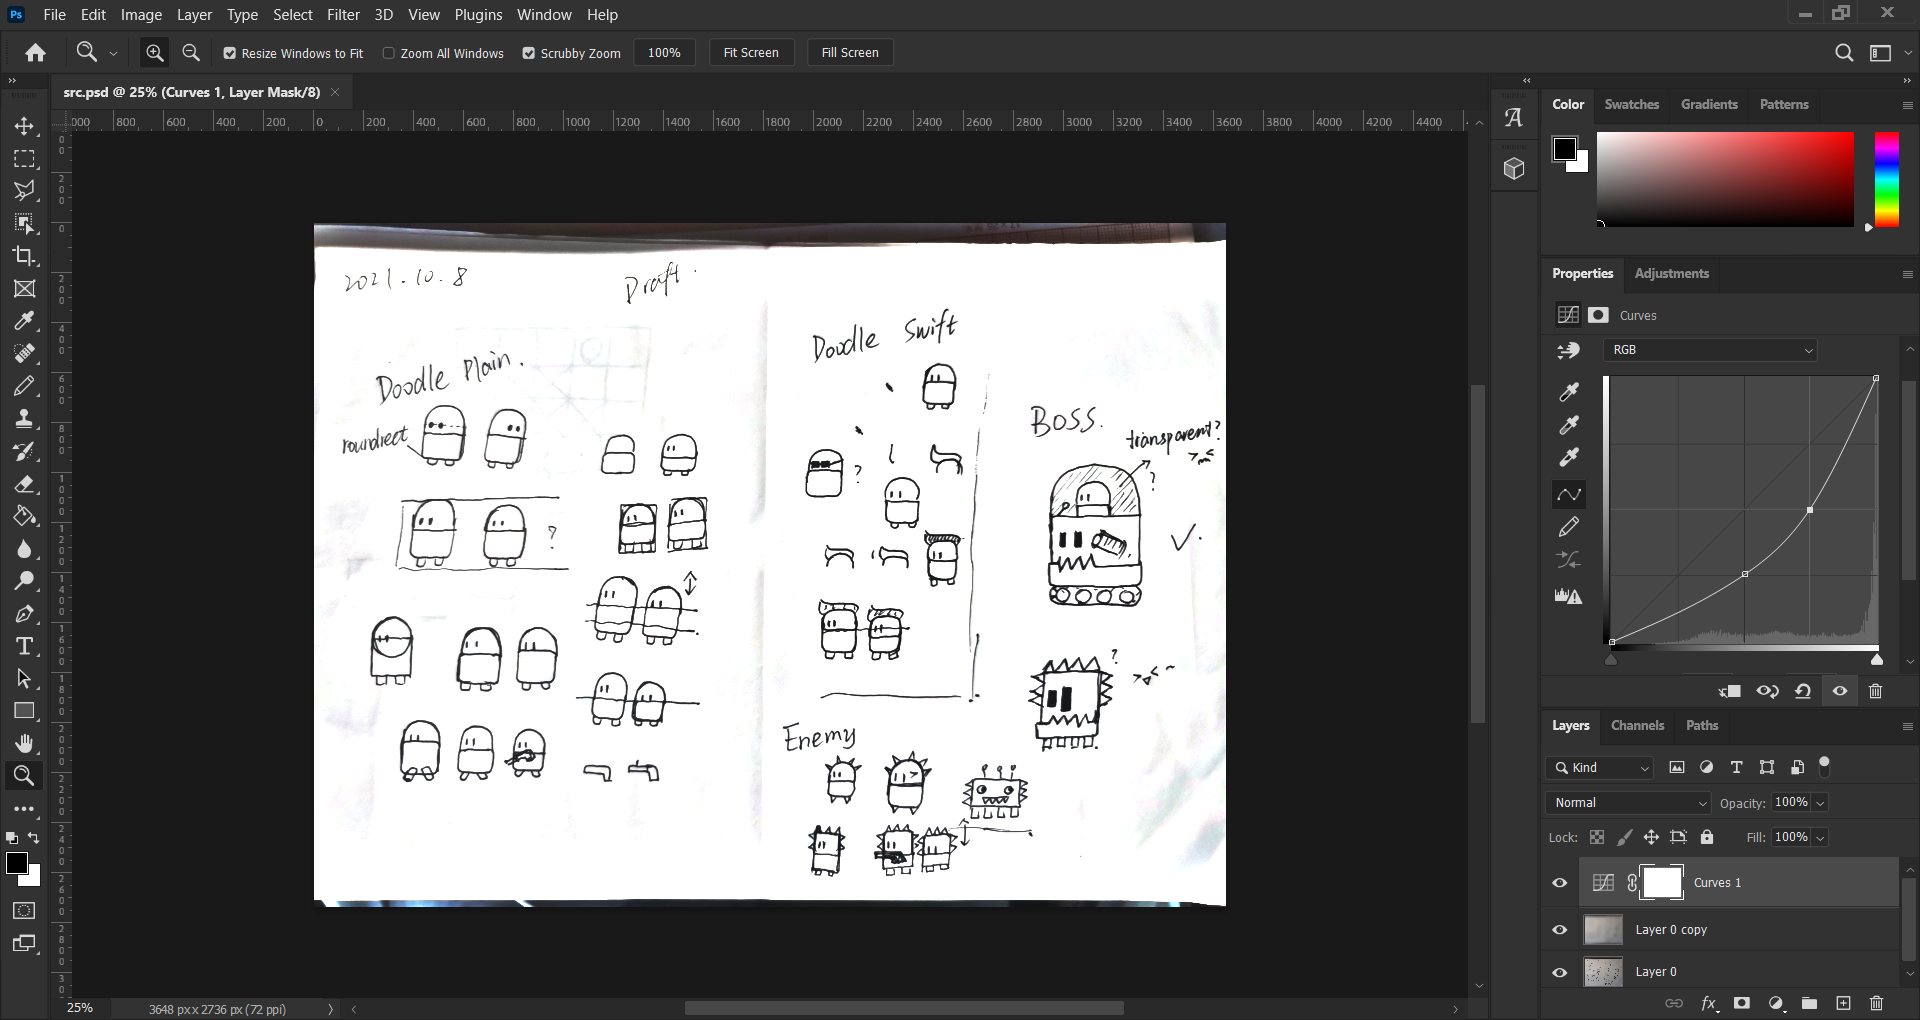
You’ll see the curve dialog in the “Properties” tab above layers. Adjust the curves to fine-tune the color and contrast.
Finally, save and export. Tada!🎉You get a scan copy of your image!
Automated Scanner
The action I created here only works for .jpg files. You can record your own action to support .png.🤔
Now we have another problem. In apps, we can do this with one-click, but here in PS, we have so many steps, and tedious adjustments. So in this chapter, I’ll show you how to automate editing in Photoshop with batch action.
1. Create new action
In the menu, select “Window > Actions” or simply press “Alt + F9”. You’ll see there is already a “Default Actions” set. For clarity, we create a new set called “Scan”.
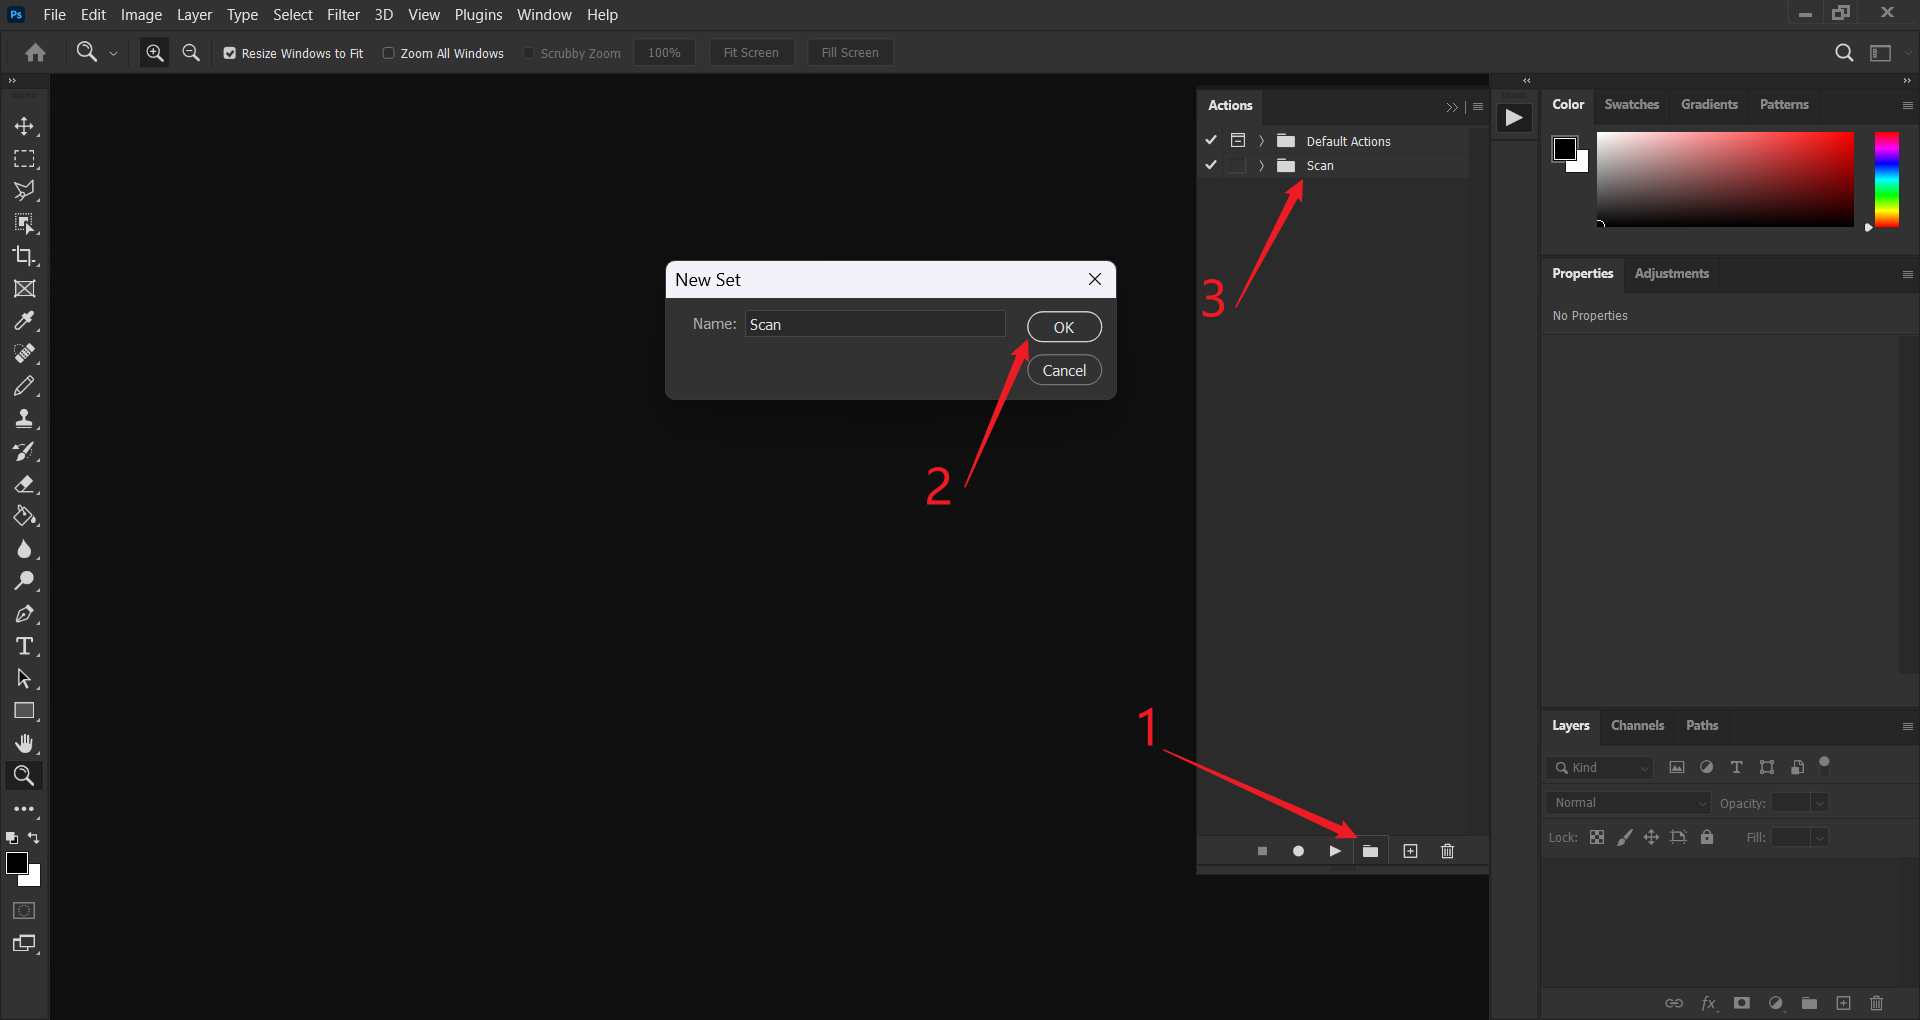
Then, we can add our automated actions in the new set.
2. Prepare workspace
Before we start recording, some preparation is needed. The purpose of this is to simulate the input for the action. The input is simple, just open any image to edit.
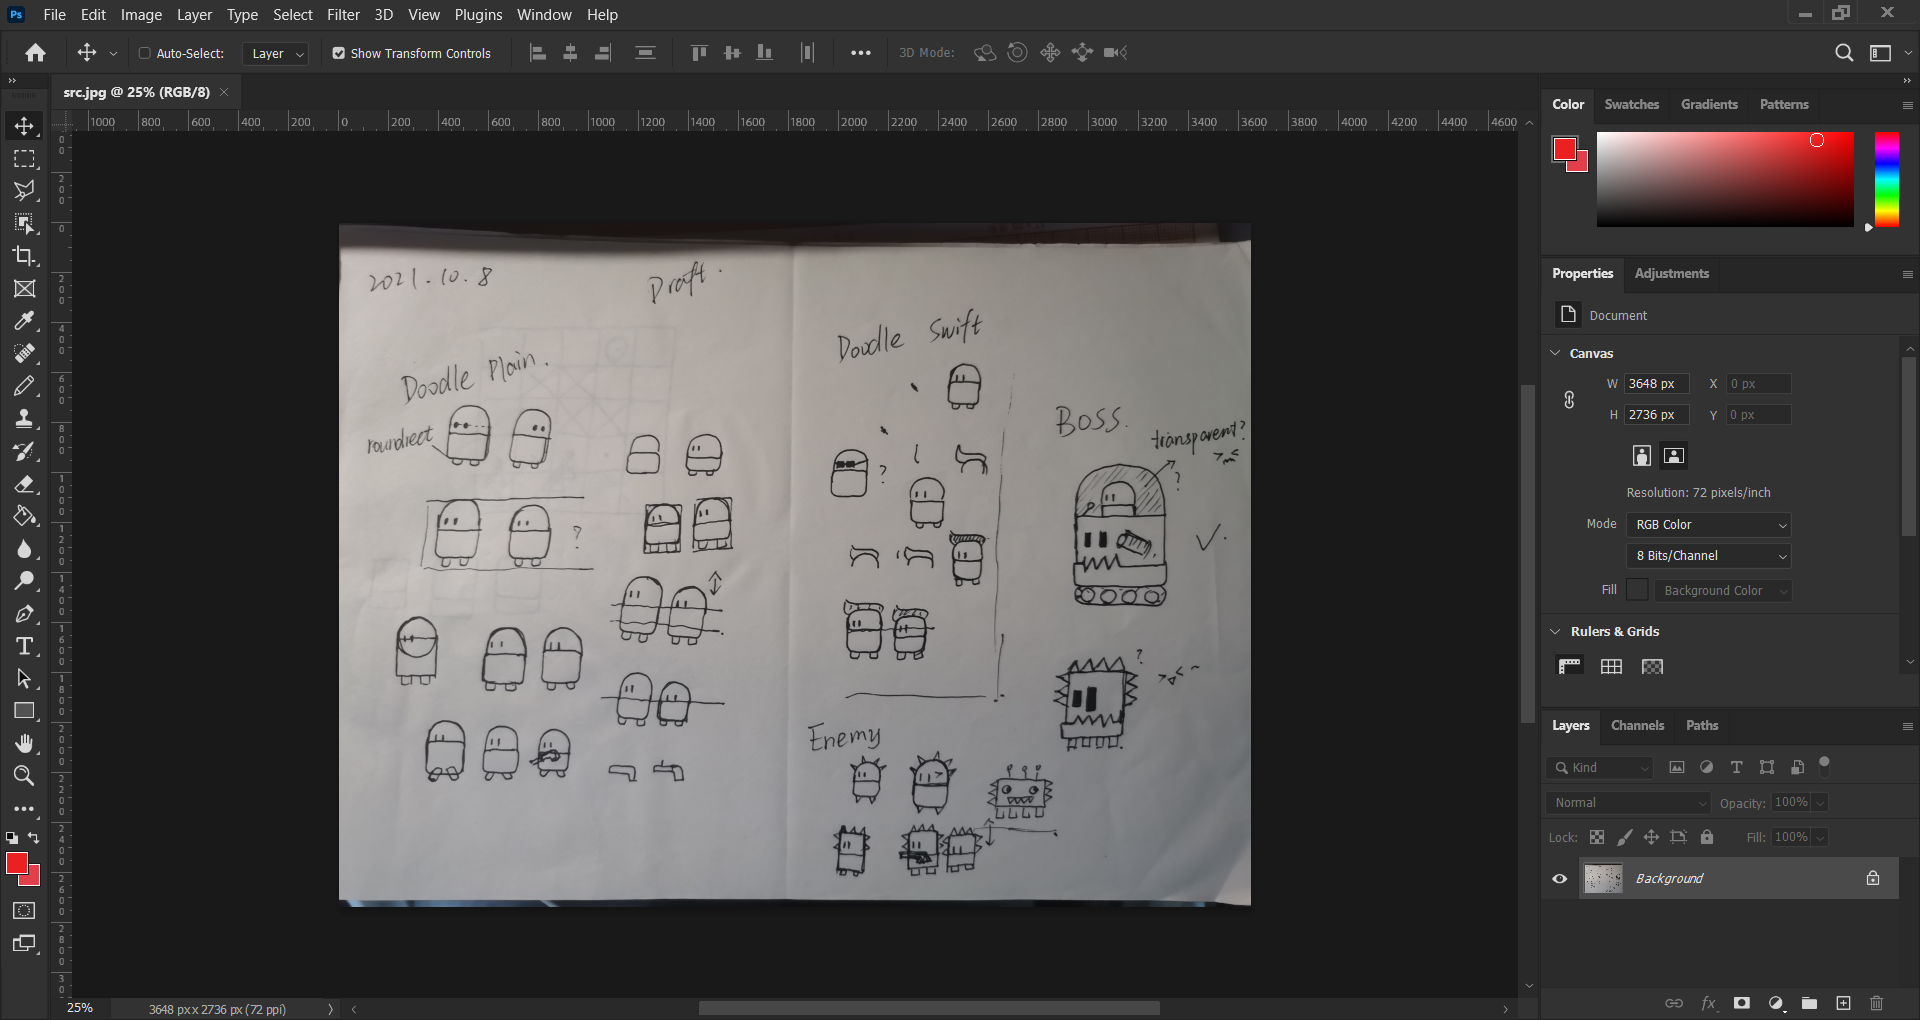
This preparation is not necessary and you can record “Open” action later. I’ll talk about this difference later in the next step.
3. Record action
3.1 Start recording
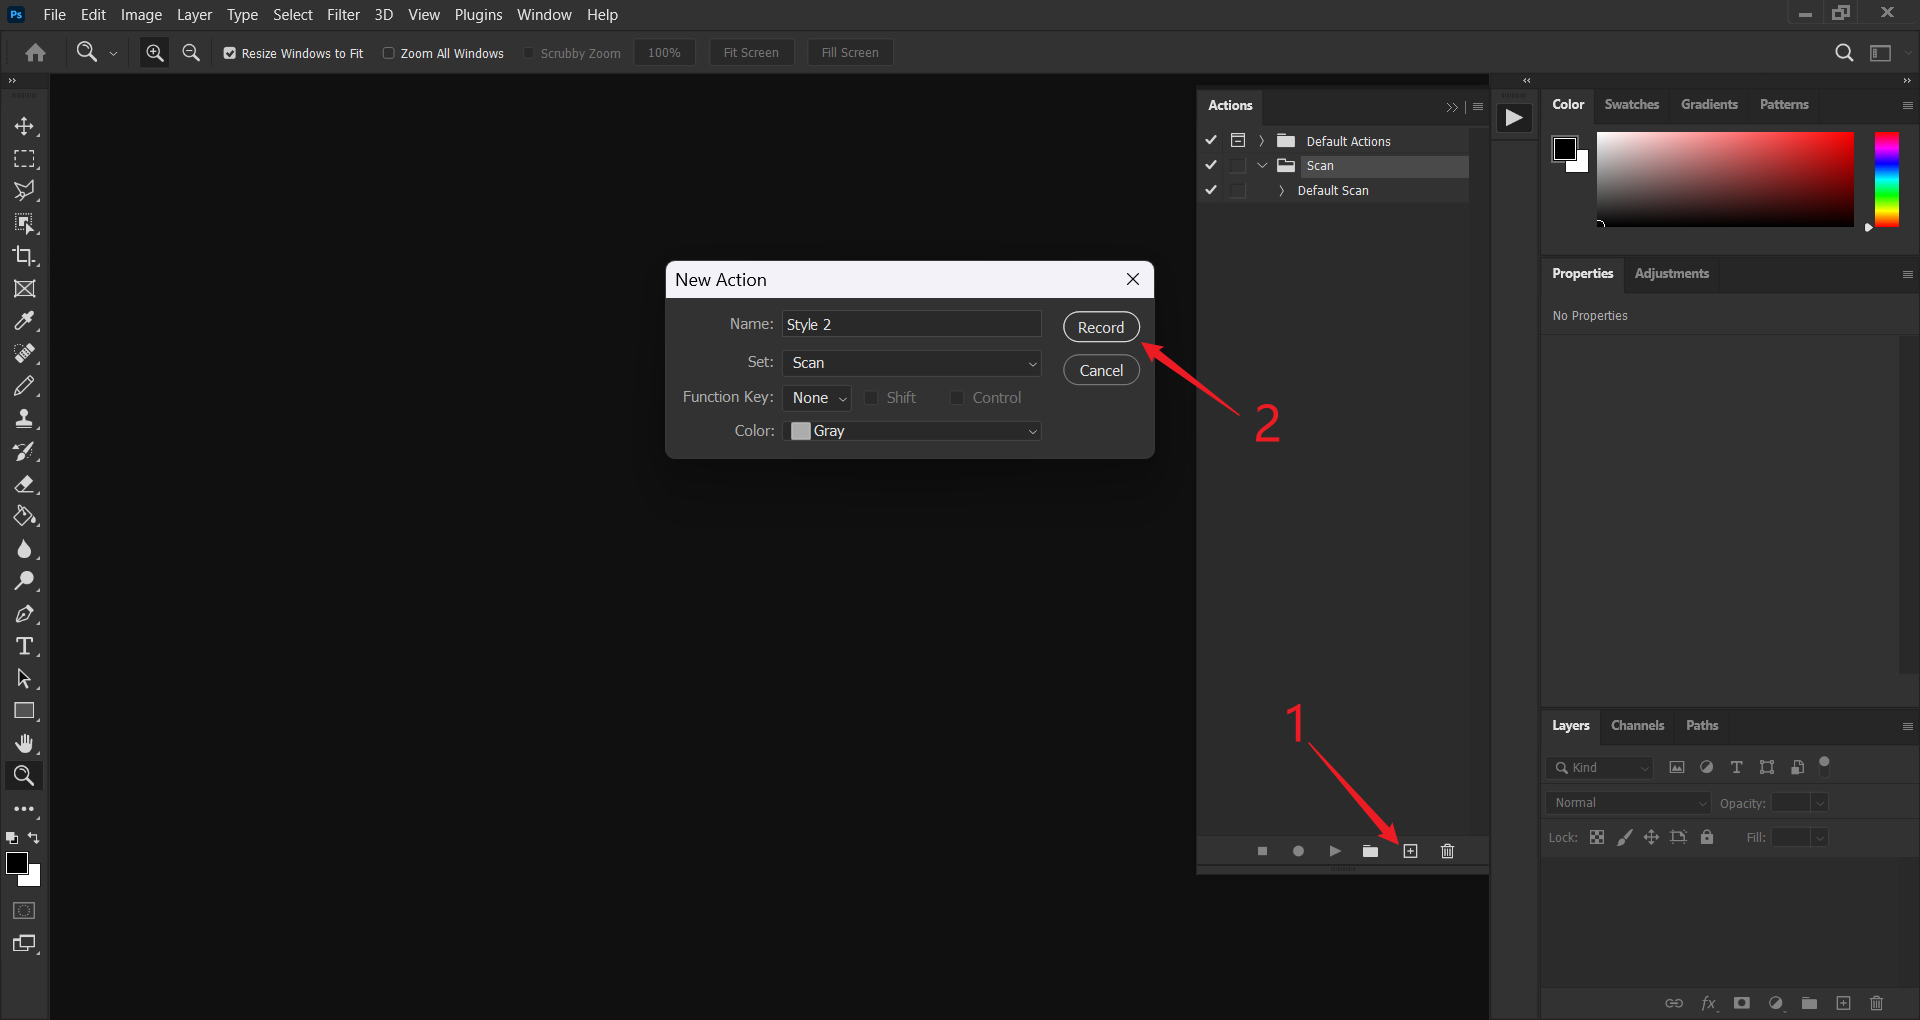
On the bottom of the panel, click “New Action”. I already have “Default Scan” action created, so here I’ll create another called “Style 2” since the parameters may differ slightly.
The following image is starting recording without preparation. Otherwise, start recording with that opened image window focused.
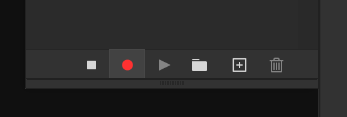
After you click “Record”, the action panel will go online.
3.2 Open image
If you’ve done the preparation, just switch to that opened image. If not, just open it. The difference is that, the latter will have an explicit open action.
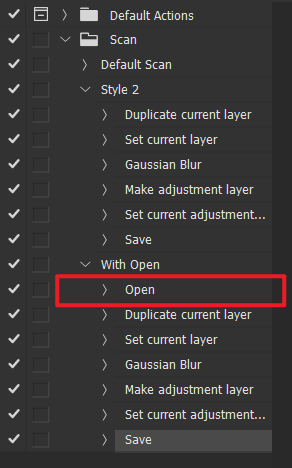
3.3 Record actions
Now, do what you did in the last chapter. Don’t tell me you’ve already forgot it.🥹
If you take wrong steps, you can stop recording and delete the bad steps. And of course, you need to undo till the last correct step.
3.4 Save image
There is one thing I missed though. For batch processing, we may not want to save a .psd for each image. So we just “Save a copy” and export it as .jpg.
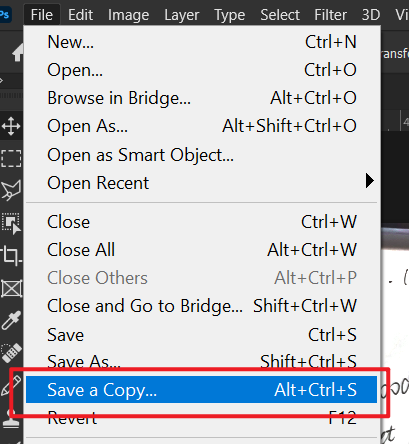
After saving, the action is done, and you can stop recording.
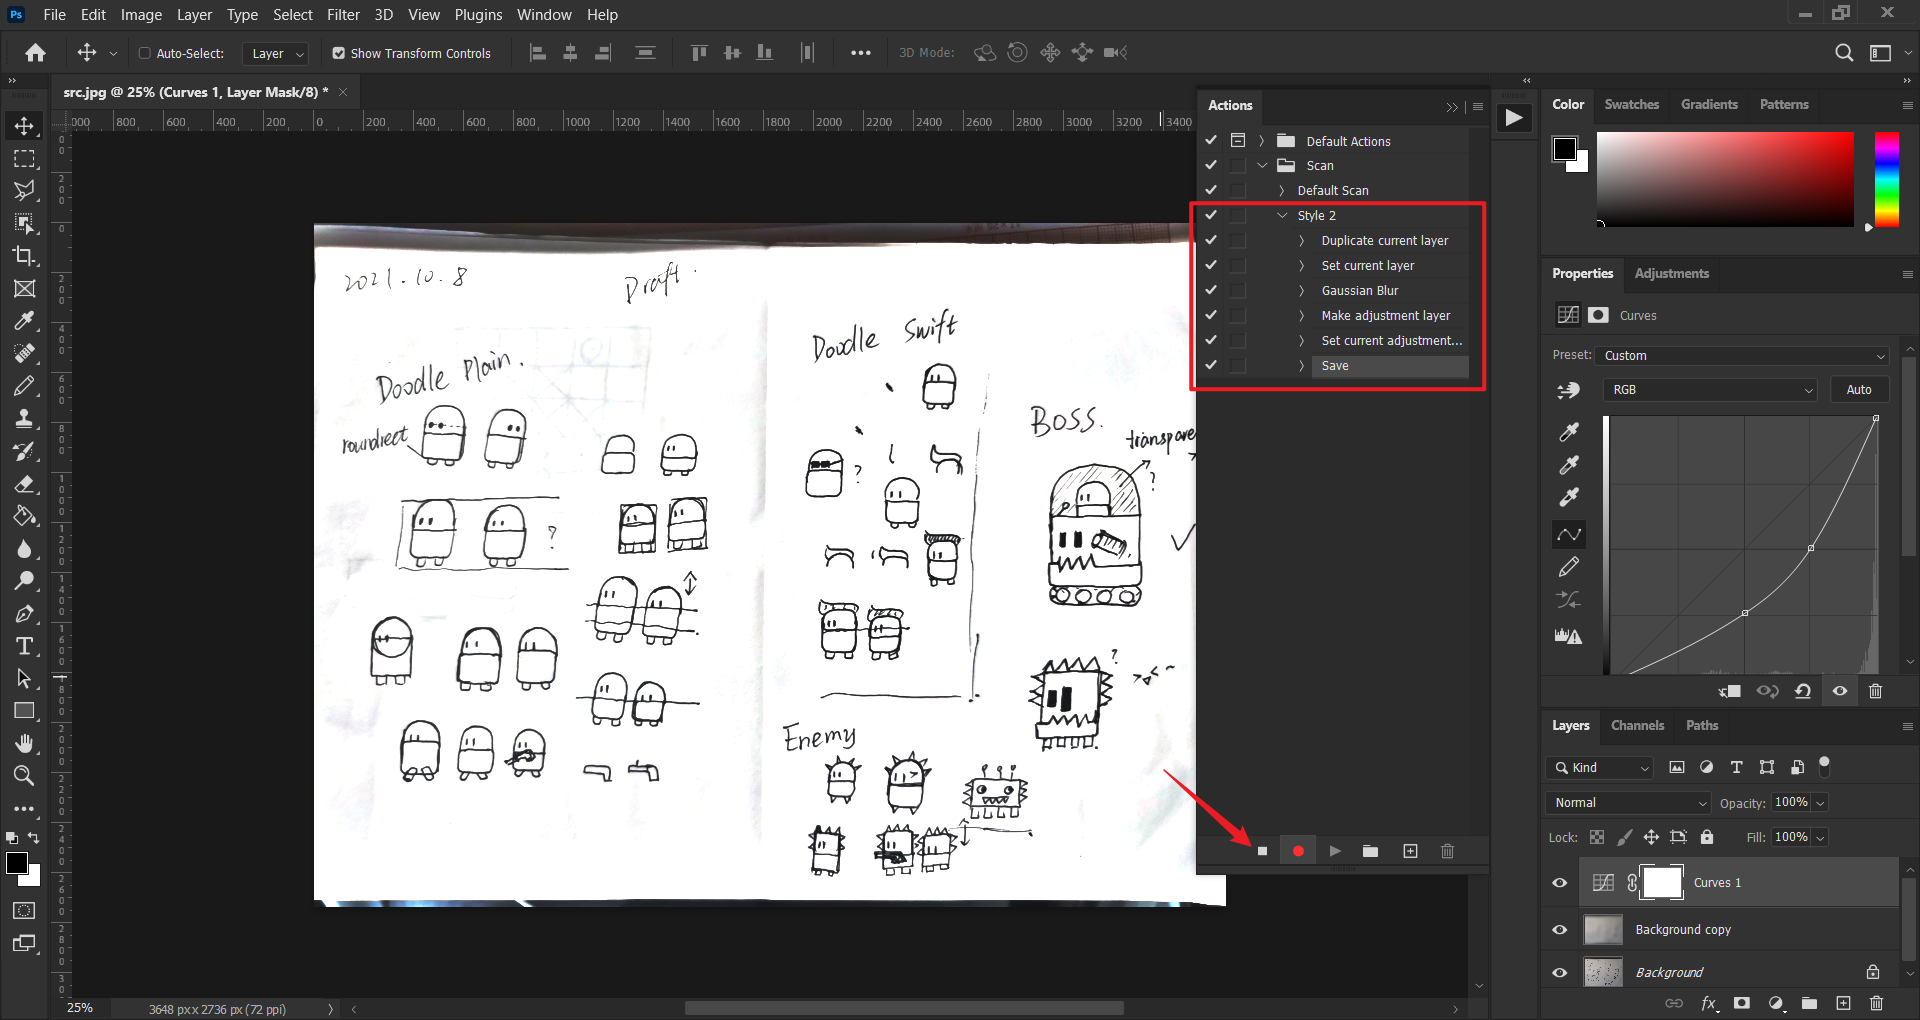
See, not that difficult, huh?😉
4. Use action
Now that we have the action, how to use it?
Go to “File > Automate > Batch…”, and you’ll get the Batch dialog. Choose the action we recorded just now. Additionally, you can choose source and destination and many more.
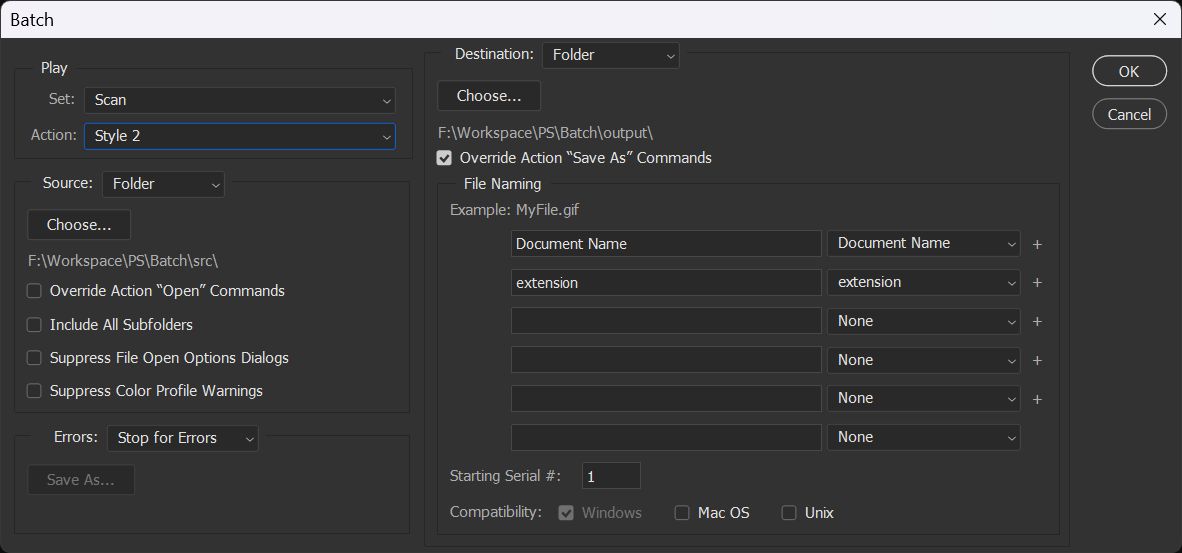
If you included “Open” in your action, then you need to check “Override Action ‘Open’ Commands”. And similarly, “Save as” command is also overridden. Click OK, and see Photoshop working by itself!😁
Epilogue
It’s a small trick, but I want to save it in case I forget it sometime in the future. Anyway, enjoy! ᓚᘏᗢ


