Configure Visual Studio for Non-MSVC Projects
Scenario
Well, there’s no doubt that Visual Studio is the ultimate IDE in the universe. It is really awesome!
![]()
Visual Studio 2022
However, it mainly focus on MSVC solution, thus default configurations are all for these projects. Thus we may need some extra configuration if we want to do cross-platform development to tell him what flavor of compiler we want.
Example
For example, in OS labs, we need to write GNU-style C with MIPS on Linux! It’s literally impossible before, but now that we have Windows Subsystem for Linux (WSL), everything becomes SO EASY! We can just use WSL as a terminal in Visual Studio and make the best of this incredible IDE.
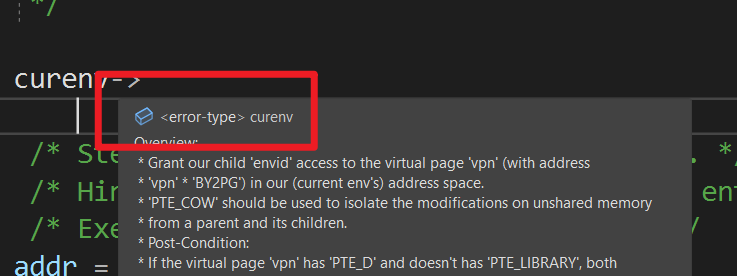
Unfortunately, this project is a GNU Make project, which is not fully compatible with MSVC. As a result, the powerful IntelliSense may not function properly due to some syntax reasons like what is shown below.
Solution
Preparation
Here, I’d like to show the complete procedure to configure BUAA OS Lab on Windows with Visual Studio and WSL.
Before you start, you have to, of course, download and install Visual Studio and WSL on your computer. For WSL, just refer to this article below, or browse the internet for more information.
And of course, you must have Git on your computer.
One more thing, you should have MinGW for GCC support. You can download it here.
Create Project
As stated before, OS Lab is a Make project, so we can not manage it with MSVC project. Which means, it is merely a folder, an ordinary folder.
I guess you must have some experience with Git, right? Since the source code is on GitLab, and to code on our local machine, we have to clone a repository locally, so that we can make push and pulls.
To achieve this, you may need to generate a token in GitLab. This is not difficult. Just generate a token, and use
httpprotocol. The only thing you need is to remember the token and use it as password.Notice that, you have to use profile the same as GitLab. That is to say, the Username is your real name, and Email is your BUAA mail.
After done with token, just clone it to your own computer. One important thing is that, make sure your directory structure is like this.
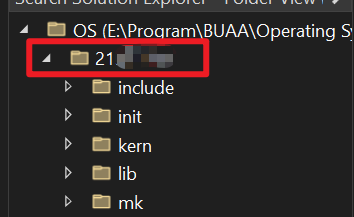
\OS is your project root folder, and ${student_id} is the actual git folder (.git\ is under ${student_id}). Seriously!
When you open the project, you actually open project folder, instead of the git folder.
Did you know? Visual Studio has integrated Git! It is extraordinarily convenient! VS can identify Git repository automatically, and graphical management is far easier than command line. Try it out!
Now, you have created the project.
Configuration
You might be able to start coding after you finished the last step. However, you may encounter the problem I mentioned at the beginning of this article.
The reason behind this is that default IntelliSense is for MSVC project, while our project uses GNU-C, which has some extended syntax. Of course, MSVC IntelliSense will not be able to recognize these alien syntax, which cause it to behave improperly.
You can find official documentation for this here.
You must have MinGW installed.
Add Configuration
Step 1. Add Configuration File
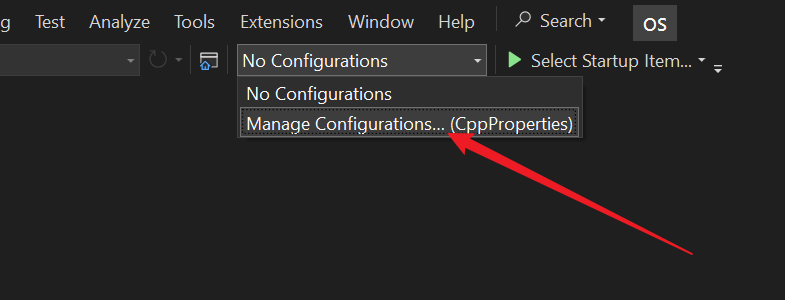
You should see ‘No Configurations’ in your toolbar. Click it and select Manage Configurations.
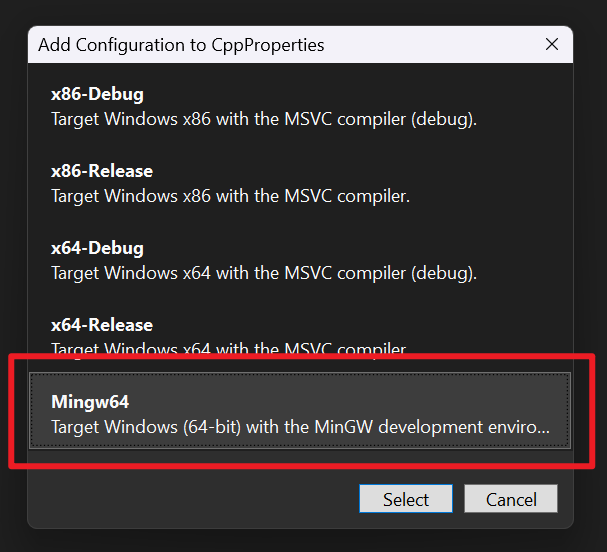
Then, in the pop-up window, choose ‘Mingw64’ and then click ‘Select’ to confirm.
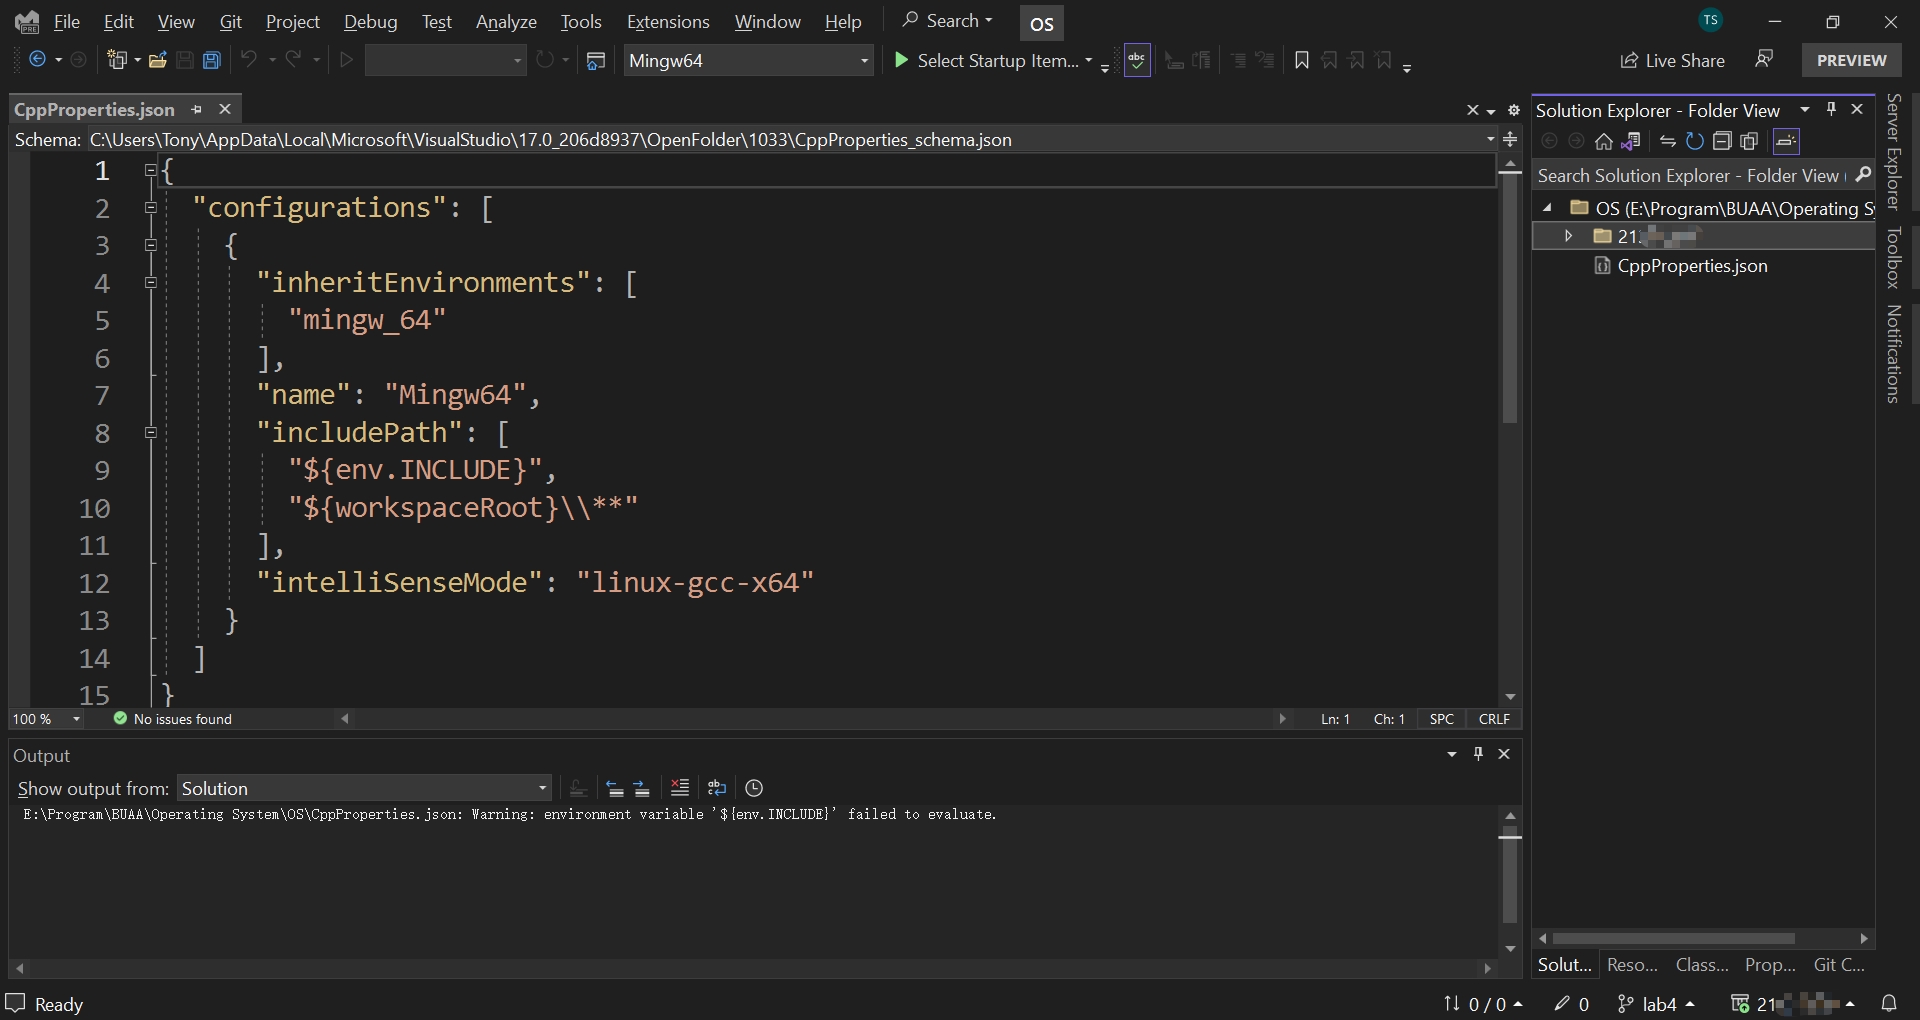
After this, Visual Studio will automatically generate a template configuration file - CppProperties.json - under the root folder. And you should see things like this.
Now you should understand why we put our git folder under a root folder. Because we do not want this
CppProperties.jsonto be included in our real project.
You may see warnings in the Output window, but don’t worry, we’ll neglect it.
Step 2. Customize Configuration
If you open any source file now, you are sure to see lots of errors caused by undefined identifiers. That’s because we didn’t tell Visual Studio where to find header files.
I guess you must have noticed that, in this configuration file, we tell Visual Studio the intelliSenseMode we want is linux-gcc-x64. However, our project is a 32-bits kernel, so we should change it to linux-gcc-x86.
Well, VS has completion for this file, so you can actually choose within a range of available choices.
Here is a complete configuration file. Just replace MINGW_HOME with your own installation location. (No \ needed at the end of the directory.)
1 | { |
One suggestion is that, you should place ${workspaceRoot}\\** at the first place, so that VS can use your header files first if there are multiple files with the same name.
One more thing, the MinGW version may change. So you should better check out the installation folder of it, and see which version you’re using. Here, my version is 9.2.0, as you can see in the file. Just replace it depending on your case.
Now, open your source files to see if they are correctly analyzed. 😉
Still, you may need add those
definesto enable some macros likeDT_DIRindirent.h.
Well, some of my friends use Jump Server in Visual Studio Code. That’s convenient, too, I guess. After all, Visual Studio Code is more light-weight.
Any way, I think Visual Studio + WSL is a wonderful combination.
I think, this is it. Have fun!
 WeChat


