Deploy MySQL on Linux Server
Procedures
Step 1. Prerequisites
Well, to deploy MySQL on a Linux server, you should have a Linux server first. Of course.
Step 2. Install MySQL
Just execute a ordinary install command.
1 | sudo apt install mysql-server |
Then, you can check the installation.
1 | mysql --version |
And you can check the status of MySQL service. If not started, execute the command below and check again.
1 | systemctl status mysql.service |
Step 2. Set Root Password
After installation, we should reset our root password. First, enter MySQL.
1 | sudo mysql -u root |
Notice that, we have to use
sudoat the first time. Since it requires some extra privileges.
Then, we can change root password by the following SQL. Just replace 123456 with your favorite password. 🤪
1 | ALTER USER 'root'@'localhost' IDENTIFIED WITH mysql_native_password by '123456'; |
Here, root can only access database from localhost. If we want to access it remotely, we can create a new user, and grant it all privileges.
1 | CREATE USER 'admin'@'%' IDENTIFIED BY '123456'; |
Step 4. Change Configuration
I’m not sure if this is needed, but I guess its somewhat useful. Just comment bind-address = 127.0.0.1 out, or change it to 0.0.0.0.
1 | vim /etc/mysql/mysql.conf.d/mysqld.cnf |
Then, restart MySQL service.
1 | sudo service mysql restart |
Step 3. Allow Access
Emm… One last step. Make sure the 3306 port is open. This can be found in the control panel of your server’s provider.
Now, we can use admin to connect to our server remotely.
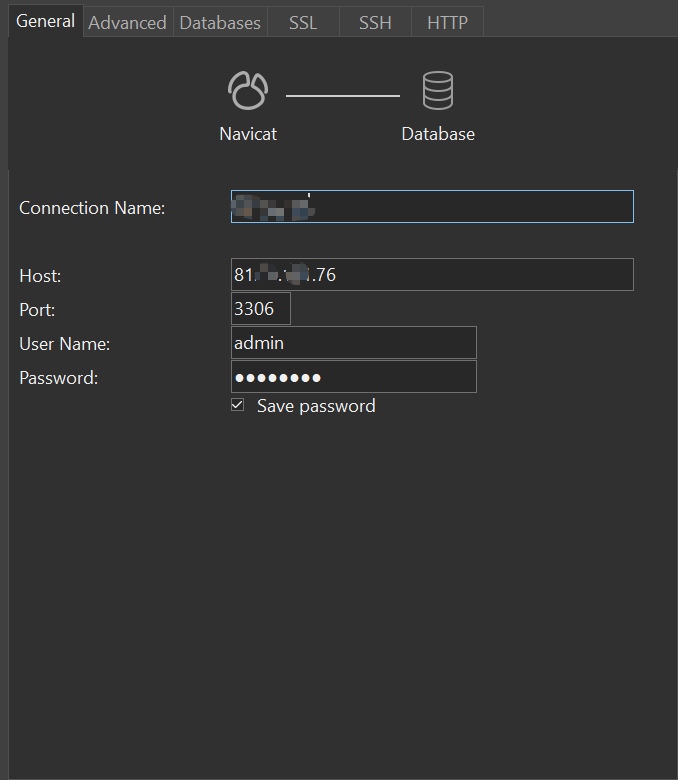
Step 4. Connect MySQL with Navicat
In Navicat, crate a new connection. And just fill it with the host, username and password. And you are good to go.
Well, this is it. Too late… go to bed! 😴
 WeChat


